Getting started with AI Agents
This walkthrough takes you from an empty workspace to a saved, testable agent that reads account data, summarizes it with an LLM, and sends a Slack message—so you learn triggers, CALL steps, and an AGENT step in one pass.
Prefer natural language? See Vibe coding to have an assistant create the same agent over MCP.
Prerequisites
- A FunnelStory workspace with models and data you can query.
- At least one Slack data connection if you follow the notification step (you can swap Slack for email using
email.sendinstead).
Step 1 — Open Agents and create a new agent
Navigate to Agents in the sidebar (/agents). You'll see your workspace's agent library — a grid of cards showing each agent's name, status (Active or Draft), trigger type, and last-updated date.
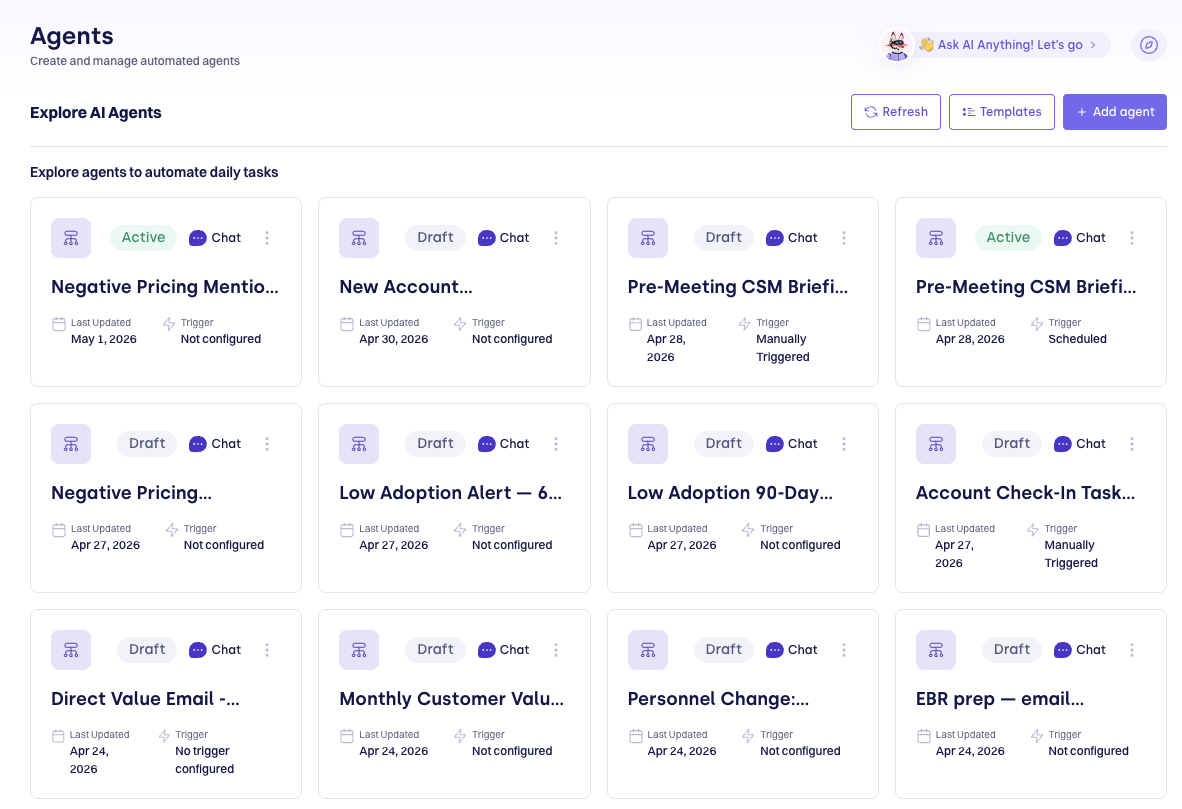
Click + Add agent in the top-right corner. Give the agent a descriptive name (for example, "Weekly Churn Risk Summary") and choose a Manual trigger to start — manual triggers only run when you explicitly start them, so they're safe for testing.
Use a Manual trigger while building. Switch to a Schedule or event-based trigger only once the agent is working end-to-end.
Step 2 — Understand the canvas
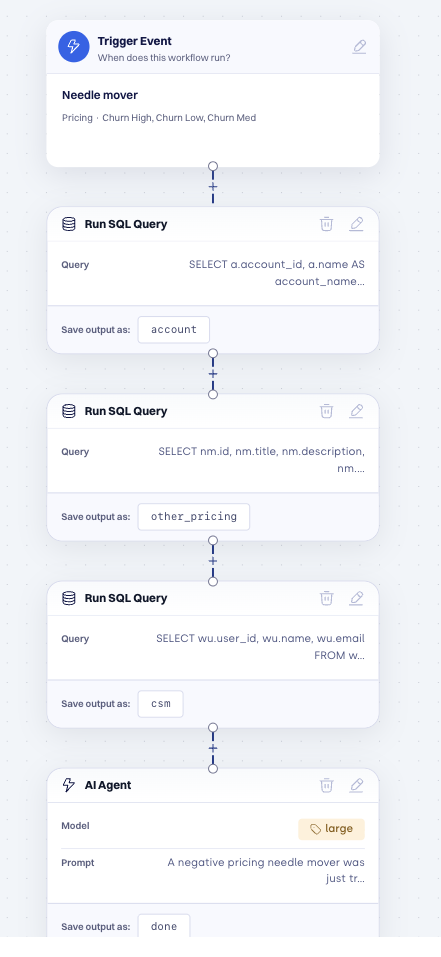
After creating the agent you land on the canvas editor. Every agent is a directed graph of steps connected by edges.
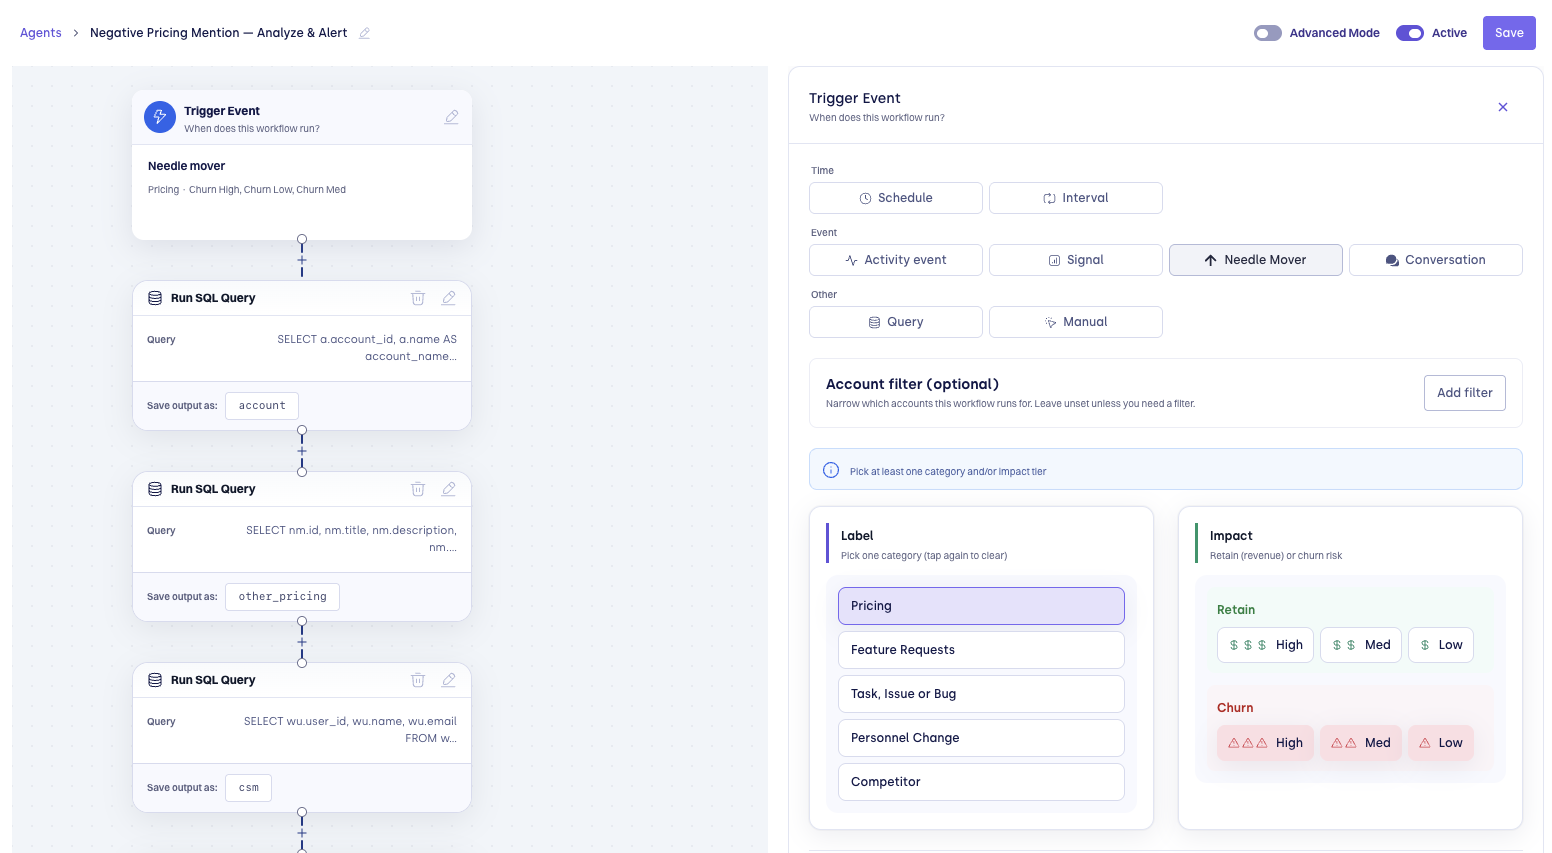
Key controls:
| Element | What it does |
|---|---|
| Trigger Event node | Always the first node. Controls when the agent runs. Click the pencil icon to edit. |
| + connector | The circle at the bottom of each node. Click it to add the next step. |
| Advanced Mode toggle | Reveals raw JSON configuration for each step (useful for complex logic). |
| Active toggle | Activates or deactivates the agent. Draft agents never run on a schedule. |
| Agent settings | Name, description, and model defaults for the whole agent. |
| Save | Persists all canvas changes. Changes are not auto-saved. |
| Zoom controls (bottom-left) | + / − / fit-to-screen. Use fit-to-screen to see the full graph at once. |
Step 3 — Add a CALL step to query accounts
Click the + connector below the Trigger node. A step-type picker appears. Select Run SQL Query (under the CALL category).
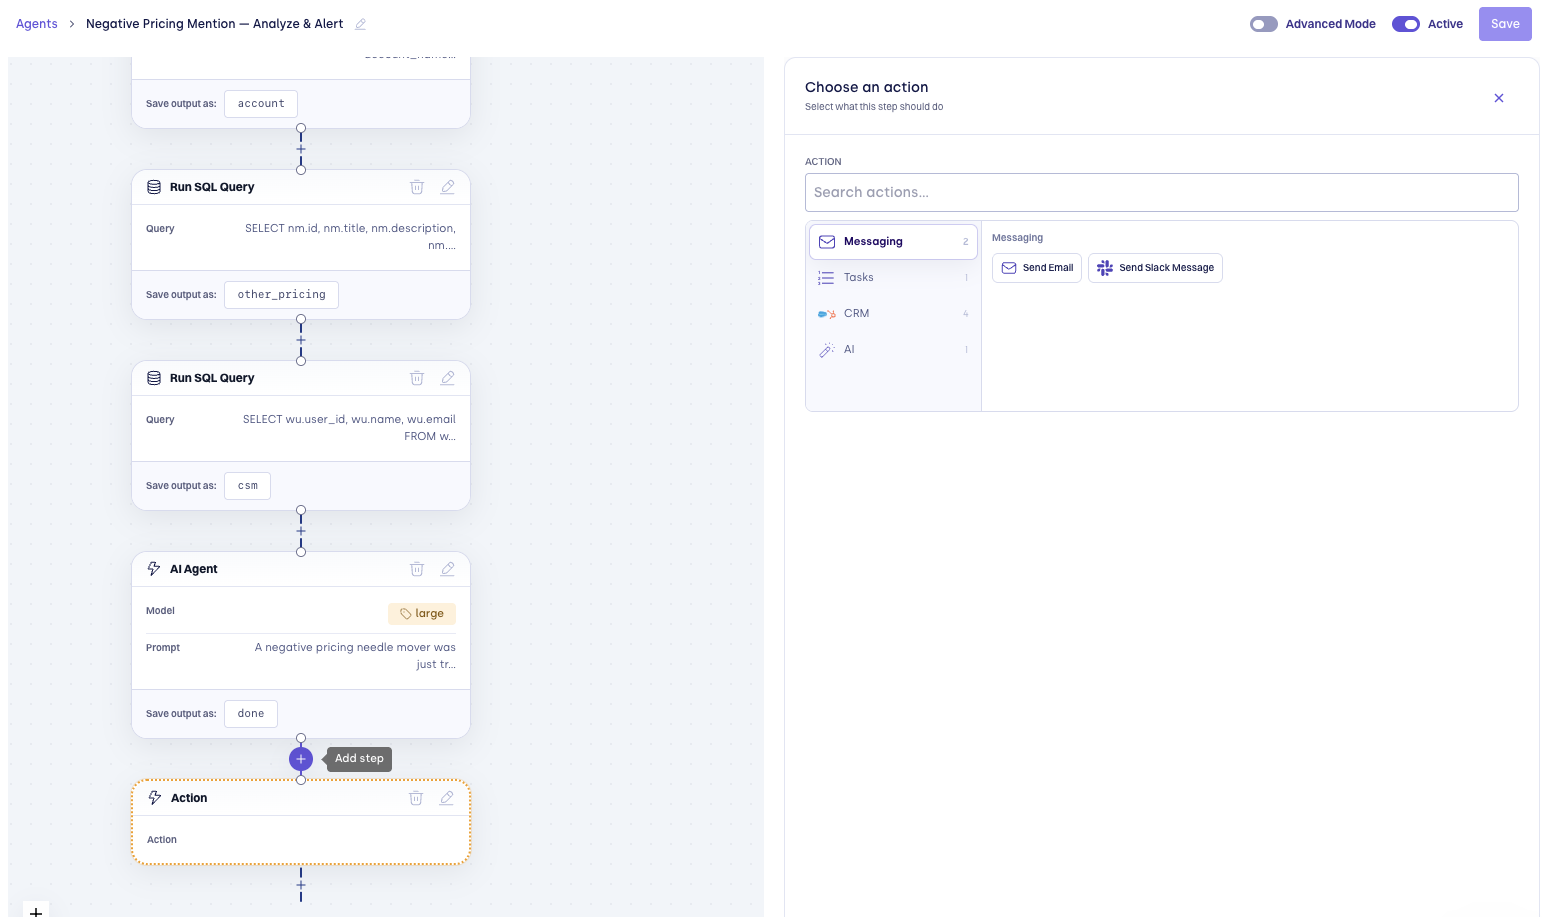
In the step configuration panel on the right, enter your query. For example, to fetch at-risk accounts:
SELECT
  account_id,
  name,
  health_score,
  arr
FROM accounts
WHERE health_score < 50
ORDER BY health_score ASC
LIMIT 20
Set Save output as to at_risk_accounts. This name becomes a variable you can reference in later steps as {{ $.at_risk_accounts }}.
Click the step node's checkmark or click elsewhere on the canvas to confirm.
Step 4 — Add an AI Agent step to summarize
Click + below the SQL step and select AI Agent.
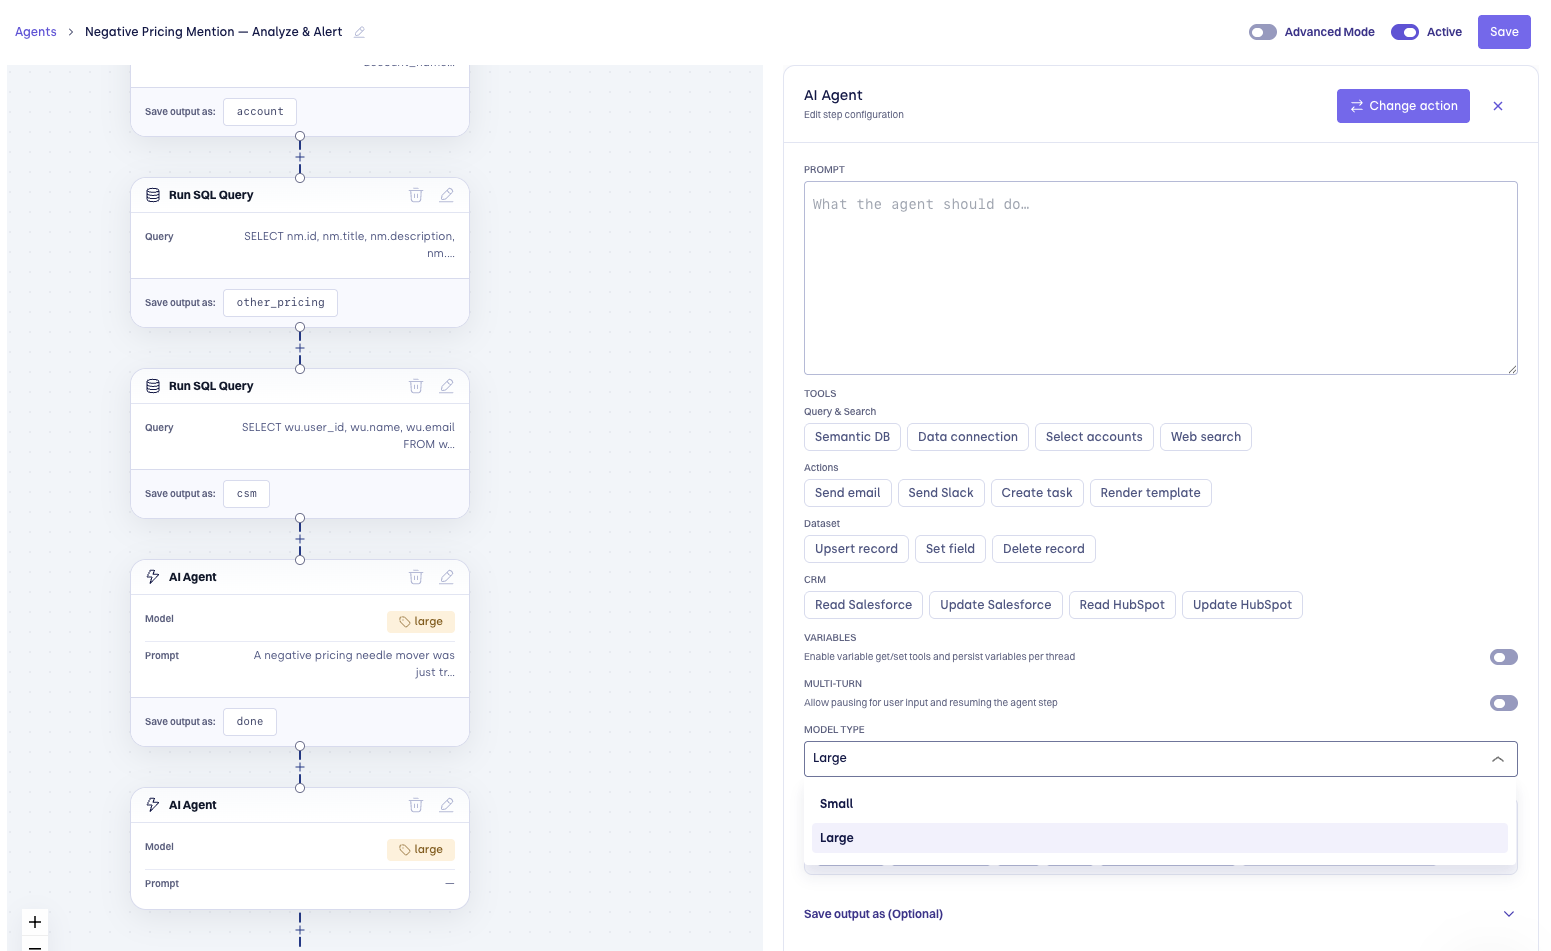
Configure the step:
- Model — Choose
smallfor fast structured summaries,largefor richer narrative output. - System prompt — Sets the assistant's role and output format:
You are a CSM assistant. Output a concise bullet-point summary.Do not use markdown code fences.
- User prompt — The actual request, referencing the SQL output:
Summarize the top churn risks and any quick wins from this account list:{{ $.at_risk_accounts }}
- Save output as — Set to
summaryso you can reference it in the next step.
The UI shows all available variable names when you type {{. Use exactly the name you entered in Save output as of the previous step.
Step 5 — Add an action step to send a notification
Click + below the AI Agent step. Select Send Slack Message (or Send Email if you don't have a Slack connection).
Configure the step:
- Connection — Select your Slack data connection from the dropdown.
- Channel ID — The Slack channel ID where the message will be posted (e.g.
C08ABCDEF). - Text — Compose the message body using the summary variable:
:rotating_light: *Weekly Churn Risk Summary*{{ $.summary }}
The canvas now has four connected nodes: Trigger → SQL Query → AI Agent → Send Slack Message.
Step 6 — Test each step
Before saving, test each step individually using the play button on the step node.
-
Test the SQL step — Click the play button on the Run SQL Query node. A test-run panel opens showing the raw query result. Verify rows are returned and column names look correct.
-
Test the AI Agent step — Click play on the AI Agent node. The LLM response appears in the test panel. Confirm the output is well-formed and references the right accounts.
-
Test the Slack step — Click play on the Send Slack Message node. Check your Slack channel for the test message.
You can also run the entire agent end-to-end by clicking Test Run from the trigger node. The run history page shows logs for each step.
Step 7 — Save and activate
Click Save in the top-right corner. The agent is now saved as a Draft.
When you're ready to run it on a schedule:
- Click the Trigger Event node's pencil icon.
- Change the trigger type from Manual to Schedule.
- Set your cadence (e.g. Weekly, Monday 08:00).
- Click Save again.
- Toggle Active to turn the agent on.
The agent will now run automatically on your chosen schedule.
Complete canvas reference
Here is the full step sequence used in this walkthrough:
Trigger Event (Manual → Schedule)
  └─ Run SQL Query         → save as: at_risk_accounts
       └─ AI Agent         → save as: summary
            └─ Send Slack Message
Each step passes its output to the next via the named variable. Later steps can reference any earlier output, not just the immediately preceding one.
Next
- Triggers — run on a schedule, on needle movers, on SQL rows, and more
- Testing and runs — run history, limits, debugging
- Examples — copy-paste patterns for common CSM workflows