Snowflake
The Snowflake connection lets FunnelStory query your warehouse with read-only access so you can build data models on curated tables and views—common for ARR, account dimensions, and historical metrics.
What FunnelStory uses it for
- Data models — Standard SQL against Snowflake; ideal for large datasets and role-based access you already manage in Snowflake.
Before you connect
Create a dedicated user and role with least privilege:
- Role — Create a role (for example
FUNNELSTORY_ROLE), grantUSAGEon the warehouse FunnelStory will use, and grant the role to your user. - User — Create a user with
DEFAULT_ROLEset to that role. - Database/schema —
GRANT USAGEon the database and schema, thenGRANT SELECT ON ALL TABLES/VIEWSin that schema, plusFUTUREgrants if you want new objects included automatically.
Snowflake supports password or RSA key pair authentication. For key pair auth, register the public key on the user (ALTER USER … SET RSA_PUBLIC_KEY='…'), base64-encode the private key, and paste it (with optional passphrase) into the FunnelStory form when the UI requests it. See Snowflake key-pair documentation for key generation details.
Add the connection in FunnelStory
-
Open Configuration → Connections → Add connection, then choose Snowflake.
-
Complete the fields in the connection form:
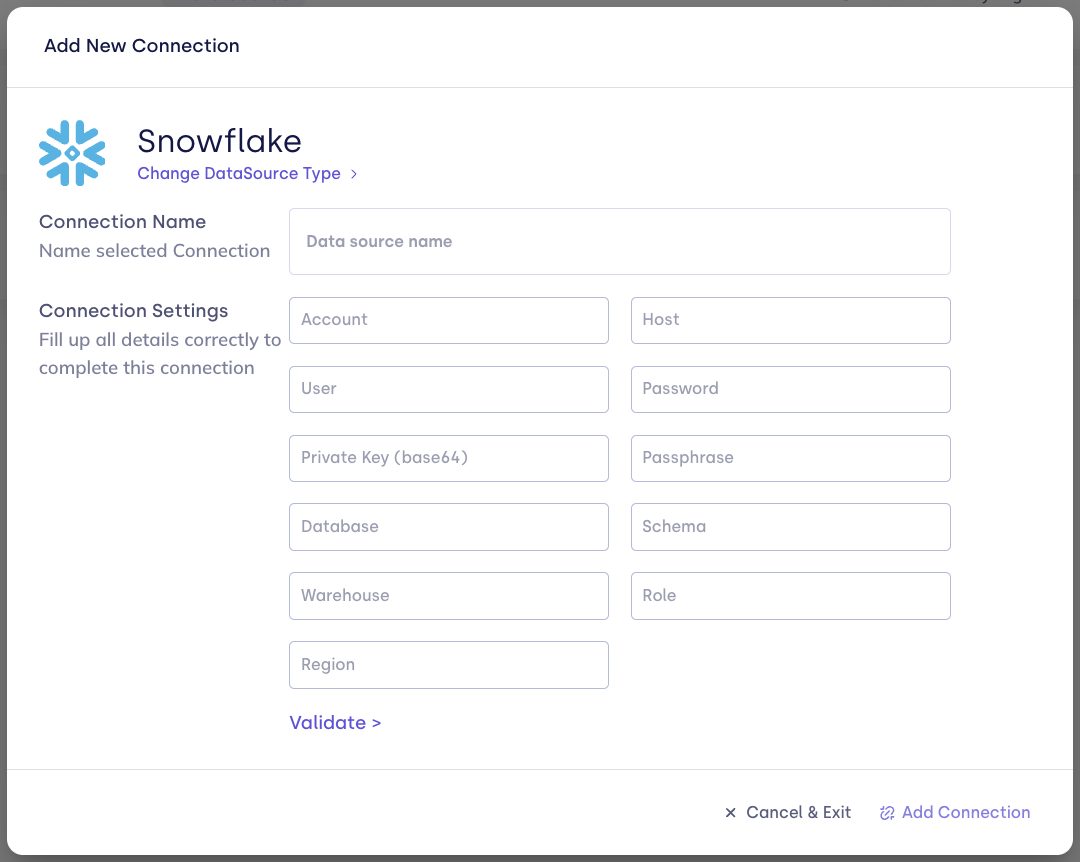
| Field | Description |
|---|---|
| Connection name | Display name. |
| Account | Snowflake account identifier (as in the Snowflake URL). Keep this even when Host is set — it is still the account FunnelStory authenticates as. |
| Host (optional) | TCP hostname. Use a custom or private endpoint when the public *.snowflakecomputing.com host is not reachable (for example xy12345.us-east-1.privatelink.snowflakecomputing.com). Leave empty to use the public hostname built from Account and Region. When Host is set, Region is ignored. Paste hostname only (no https://). |
| User | Snowflake user. |
| Password | Password (omit if using private key only). |
| Private key (Base64) / Passphrase (optional) | For RSA key pair authentication. |
| Database | Default database. |
| Warehouse | Warehouse to run queries. |
| Schema (optional) | Default schema. |
| Role (optional) | Role to assume. |
| Region (optional) | Used only when Host is empty, to build the public *.snowflakecomputing.com hostname. |
- Click Validate, then Add Connection.
After you connect
Use Snowflake SQL in models. See Writing queries for value types and timestamps.